Android - Fancier Form using TableLayout
This post will show how to rearrange the previous post layout to using TableLayout. So that the form will look more fancier.
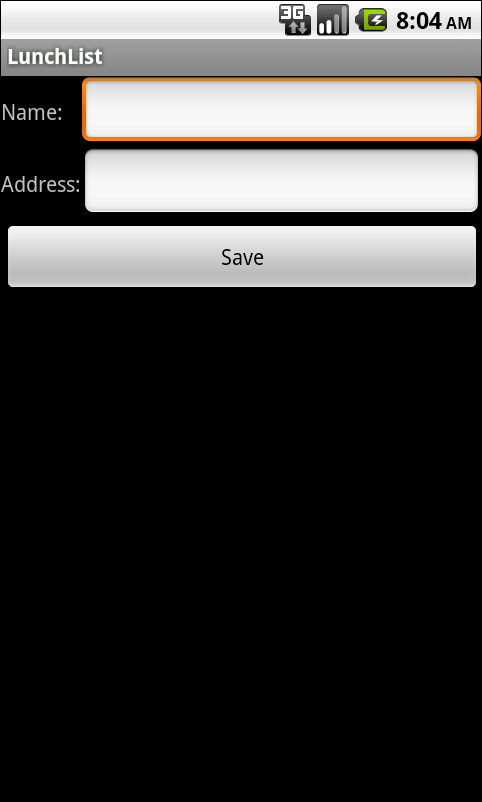 Notice how the two EditText fields line up, whereas before, they appeared immediately after each label.
The RadioGroup and RadioButton widgets go inside the TableLayout, so they will line up with the rest of table. You can see this once you recompile, reinstall, and run the application:

Recompile, reinstall, and run the application. Confirm that you can save the restaurant data without errors.
If you are wondering what will happen if there is no selected RadioButton, the RadioGroup call to getCheckedRadioButtonId() will return -1, which will not match anything in our switch statement, and so the model will not be modified.
Reference :
By Mohd Zulkamal
NOTE : – If You have Found this post Helpful, I will appreciate if you can Share it on Facebook, Twitter and Other Social Media Sites. Thanks =)
Note : Please refer previous post before you get step on this tutorial.
Switch to a TableLayout
- Open LunchList/res/layout/main.xml and modify its contents to look like the following:
<?xml version="1.0" encoding="utf-8"?>
<TableLayout xmlns:android="http://schemas.android.com/apk/res/android"
android:layout_width="fill_parent"
android:layout_height="fill_parent"
android:stretchColumns="1">
<TableRow>
<TextView android:text="Name:" />
<EditText android:id="@+id/name" />
</TableRow>
<TableRow>
<TextView android:text="Address:" />
<EditText android:id="@+id/addr" />
</TableRow>
<Button android:id="@+id/save"
android:layout_width="fill_parent"
android:layout_height="wrap_content"
android:text="Save" />
</TableLayout>
NOTE: At this step, or any other, when you try to run your application, you may get the following screen:

If you encounter this, first try to do a full rebuild of the project. In Eclipse, this would involve doing Project > Force Clean. If the problem persists after this, then there is a bug in your code somewhere. See the Java stack trace associated with this crash, to help you perhaps diagnose what is going on.
If you encounter this, first try to do a full rebuild of the project. In Eclipse, this would involve doing Project > Force Clean. If the problem persists after this, then there is a bug in your code somewhere. See the Java stack trace associated with this crash, to help you perhaps diagnose what is going on.
Add a RadioGroup
Next, we should add some RadioButton widgets to indicate the type of restaurant this is: one that offers take-out, one where we can sit down, or one that is only a delivery service. To do this, modify LunchList/res/layout/main.xml once again, this time to look like:<?xml version="1.0" encoding="utf-8"?>
<TableLayout xmlns:android="http://schemas.android.com/apk/res/android"
android:layout_width="fill_parent"
android:layout_height="fill_parent"
android:stretchColumns="1"
>
<TableRow>
<TextView android:text="Name:" />
<EditText android:id="@+id/name" />
</TableRow>
<TableRow>
<TextView android:text="Address:" />
<EditText android:id="@+id/addr" />
</TableRow>
<TableRow>
<TextView android:text="Type:" />
<RadioGroup android:id="@+id/types">
<RadioButton android:id="@+id/take_out"
android:text="Take-Out"
/>
<RadioButton android:id="@+id/sit_down"
android:text="Sit-Down"
/>
<RadioButton android:id="@+id/delivery"
android:text="Delivery"
/>
</RadioGroup>
</TableRow>
<Button android:id="@+id/save"
android:layout_width="fill_parent"
android:layout_height="wrap_content"
android:text="Save"
/>
</TableLayout>
The RadioGroup and RadioButton widgets go inside the TableLayout, so they will line up with the rest of table. You can see this once you recompile, reinstall, and run the application:
Update the Model
The model class has no place to hold the restaurant type. To change that, modify LunchList/src/apt/tutorial/Restaurant.java to add in a new private String type data member and a getter/setter pair.Model Class
package apt.tutorial;


public class Restaurant {
      private String name="";
      private String address="";

      private String type="";
      public String getName() {
            return(name);
      }
      public void setName(String name) {
           this.name=name;
      }
      public String getAddress() {
           return(address);
      }
      public void setAddress(String address) {
          this.address=address;
      }
      public String getType() {
          return(type);
      }
      public void setType(String type) {
           this.type=type;
      }
}
Save the Type to the Model
Finally, we need to wire our RadioButton widgets to the model, such that when the user clicks the Save button, the type is saved as well. To do this, modify the onSave listener object to look like this:package apt.tutorial;
import android.app.Activity;
import android.os.Bundle;
import android.view.View;
import android.widget.Button;
import android.widget.EditText;
import android.widget.RadioGroup;
public class LunchList extends Activity {
Restaurant r=new Restaurant();
@Override
public void onCreate(Bundle savedInstanceState) {
super.onCreate(savedInstanceState);
setContentView(R.layout.main);
Button save=(Button)findViewById(R.id.save);
save.setOnClickListener(onSave);
}
private View.OnClickListener onSave=new View.OnClickListener() {
public void onClick(View v) {
EditText name=(EditText)findViewById(R.id.name);
EditText address=(EditText)findViewById(R.id.addr);
r.setName(name.getText().toString());
r.setAddress(address.getText().toString());
RadioGroup types=(RadioGroup)findViewById(R.id.types);
switch (types.getCheckedRadioButtonId()) {
case R.id.sit_down:
r.setType("sit_down");break;
case R.id.take_out:
r.setType("take_out");break;
case R.id.delivery:
r.setType("delivery");break;
}
}
};
}
Recompile, reinstall, and run the application. Confirm that you can save the restaurant data without errors.
If you are wondering what will happen if there is no selected RadioButton, the RadioGroup call to getCheckedRadioButtonId() will return -1, which will not match anything in our switch statement, and so the model will not be modified.
Reference :
By Mohd Zulkamal
NOTE : – If You have Found this post Helpful, I will appreciate if you can Share it on Facebook, Twitter and Other Social Media Sites. Thanks =)