Posts

Showing posts with the label eclipse

Android Splitting the Tab

Image
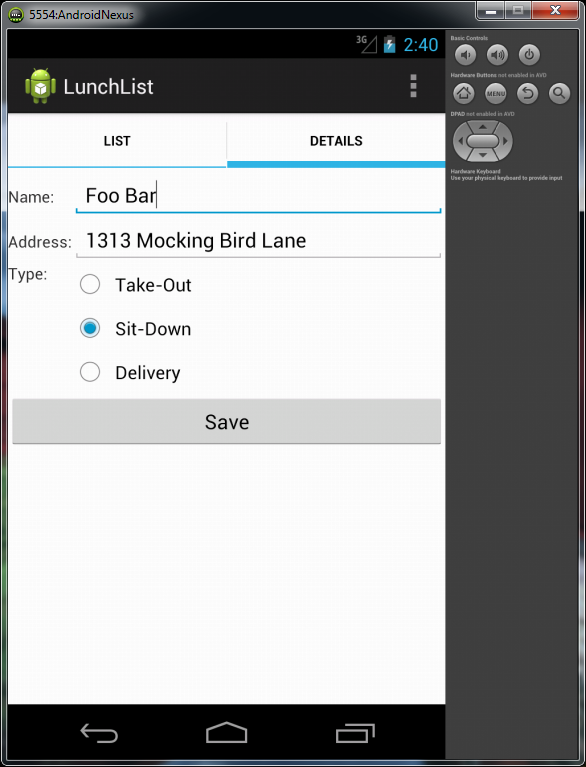
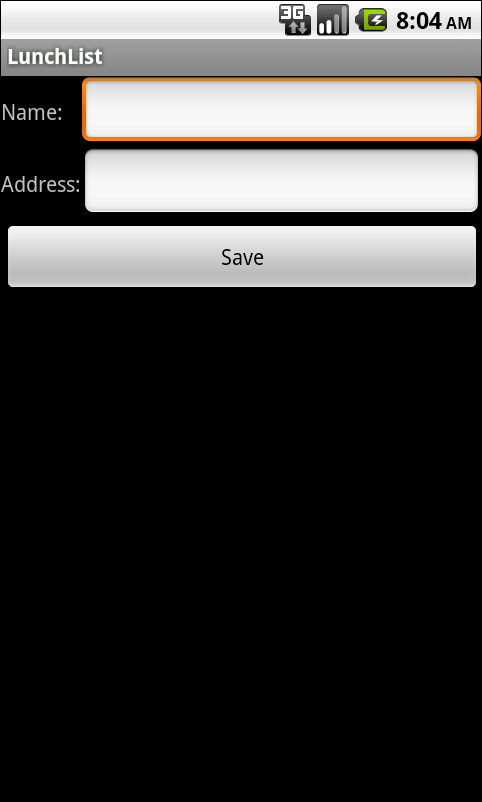
In this tutorial, we will move our ListView onto one tab and our form onto a separate tab of a TabView . Along the way, we will also arrange to update our form based on a ListView selections or clicks, even though the Save button will still only add new restaurants to our list. Note : Please follow the Android Tutorial Post Here Before You Step On This Post. Rework the Layout First, we need to change our layout around, to introduce the tabs and split our UI between a list tab and a details tab. This involves: Removing the RelativeLayout and the layout attributes leveraging it,as that was how we had the list and form on a single screen Add in a TabHost , TabWidget , and FrameLayout , the latter of which is parent to the list and details To accomplish this, replace your current LunchList/res/layout/main.xml with the following: <TabHost xmlns:android="http://schemas.android.com/apk/res/android" android:id="@android:id/tabhost" android:layout_width="fill_parent

Android - Custom ListAdapter look more fancier

Image
In this tutorial, we will update the layout of our ListView rows, so they show both the name and address of the restaurant, plus an icon indicating the type. Along the way, we will need to create our own custom ListAdapter to handle our row views and a RestaurantHolder to populate a row from a restaurant. Note : Please follow the Android Tutorial Post Here Before You Step On This Post. Create a Stub Custom Adapter Create a stub implementation of a RestaurantAdapter that will be where we put our logic for  creating our own custom rows. That can look like this, implemented as an inner class of LunchList : class RestaurantAdapter extends ArrayAdapter<Restaurant> {          RestaurantAdapter() {                 super(LunchList.this,                 android.R.layout.simple_list_item_1,model);          } } The above code use hard-wire in the android.R.layout.simple_list_item_1 layout for now, and we get our Activity and model from LunchList itself. Next we need to change our adapter

Android - Store Class Object into ArrayList or List

Image
In this tutorial, we will change our model to be a list of restaurants, rather than just one. Then, we will add a ListView to view the available restaurants. This will be rather incomplete, in that we can only add a new restaurant, not edit or delete an existing one. We will cover those steps too in a later tutorial. Note : Please refer previous post before step on this tutorial Hold a List of Restaurants First, if we are going to have a list of restaurants in the UI, we need a list of restaurants as our model. So, in LunchList , change: Restaurant r=new Restaurant(); to List<Restaurant> model=new ArrayList<Restaurant>(); Note that you will need to import java.util.List and java.util.ArrayList as well. Save Restaurant Object to List All we need to do is add a local restaurant r variable, populate it, and add it to the list: private View.OnClickListener onSave=new View.OnClickListener() {           public void onClick(View v) {                      Restaurant r=new Resta

Android - Fancier Form using TableLayout

Image
This post will show how to rearrange the previous post layout to using TableLayout . So that the form will look more fancier. Note : Please refer previous post before you get step on this tutorial. Switch to a TableLayout Open LunchList/res/layout/main.xml and modify its contents to look like the following: <?xml version="1.0" encoding="utf-8"?> <TableLayout xmlns:android="http://schemas.android.com/apk/res/android" android:layout_width="fill_parent" android:layout_height="fill_parent" android:stretchColumns="1"> <TableRow> <TextView android:text="Name:" /> <EditText android:id="@+id/name" /> </TableRow> <TableRow> <TextView android:text="Address:" /> <EditText android:id="@+id/addr" /> </TableRow> <Button android:id="@+id/save" android:layout_width="fill_parent" android:layout_height="wrap_content

Android - Creating a simple form (Eclipse)

Image
This tutorial is the first of several that will build up a lunch list application, where you can track  various likely places to go to lunch. While this application may seem silly, it will give you a chance  to exercise many features of the Android platform. Besides, perhaps you may even find the application to be useful someday. Generate the Application Skeleton Create New Project(Refer here ) Use the new-project wizard to create an empty Android project named LunchList , as described in the Link above. This will create an application skeleton for you, complete with everything  you need to build your first Android application: Java source code, build instructions, etc. In particular: Choose a build target that is API Level 9 or higher and has the Google APIs, so you can add a map to the application later. Name the project LunchList , with an initial activity also named LunchList Use apt.tutorial for the package name Modify the Layout Using your text editor, open the LunchList/res/la

Create New Android Project - Eclipse

Image
This is a tutorial of creating new android project from Eclipse tools. Note : If your eclipse dont have Android project, then you need to follow step by step here to install android plugin for eclipse . Install Android Plugin - Eclipse Eclipse From the Eclipse main menu, choose File >> New >> Project.; and this will bring up a list of project types to choose from. Fold open the Android option and click on Android Project: Press Next to advance the wizard to the main Android project page: Fill in the following:  The name of the project (e.g., Now) The Android SDK you wish to compile against (e.g., Google APIs for Android 2.3) The name of the Java package in which this project goes (e.g: com.commonsware.android.skeleton) The name of the initial activity to create (e.g., Now) At this point, clicking Finish will create your Eclipse project. Reference : Android Programming Tutorials, 3rd Edition By Mohd Zulkamal NOTE : – If You have Found this post Helpful, I will appreciate i