Posts

Android - Fancier Form using TableLayout

Image
This post will show how to rearrange the previous post layout to using TableLayout . So that the form will look more fancier. Note : Please refer previous post before you get step on this tutorial. Switch to a TableLayout Open LunchList/res/layout/main.xml and modify its contents to look like the following: <?xml version="1.0" encoding="utf-8"?> <TableLayout xmlns:android="http://schemas.android.com/apk/res/android" android:layout_width="fill_parent" android:layout_height="fill_parent" android:stretchColumns="1"> <TableRow> <TextView android:text="Name:" /> <EditText android:id="@+id/name" /> </TableRow> <TableRow> <TextView android:text="Address:" /> <EditText android:id="@+id/addr" /> </TableRow> <Button android:id="@+id/save" android:layout_width="fill_parent" android:layout_height="wrap_content

Android - Creating a simple form (Eclipse)

Image
This tutorial is the first of several that will build up a lunch list application, where you can track  various likely places to go to lunch. While this application may seem silly, it will give you a chance  to exercise many features of the Android platform. Besides, perhaps you may even find the application to be useful someday. Generate the Application Skeleton Create New Project(Refer here ) Use the new-project wizard to create an empty Android project named LunchList , as described in the Link above. This will create an application skeleton for you, complete with everything  you need to build your first Android application: Java source code, build instructions, etc. In particular: Choose a build target that is API Level 9 or higher and has the Google APIs, so you can add a map to the application later. Name the project LunchList , with an initial activity also named LunchList Use apt.tutorial for the package name Modify the Layout Using your text editor, open the LunchList/res/la

Create New Android Project - Eclipse

Image
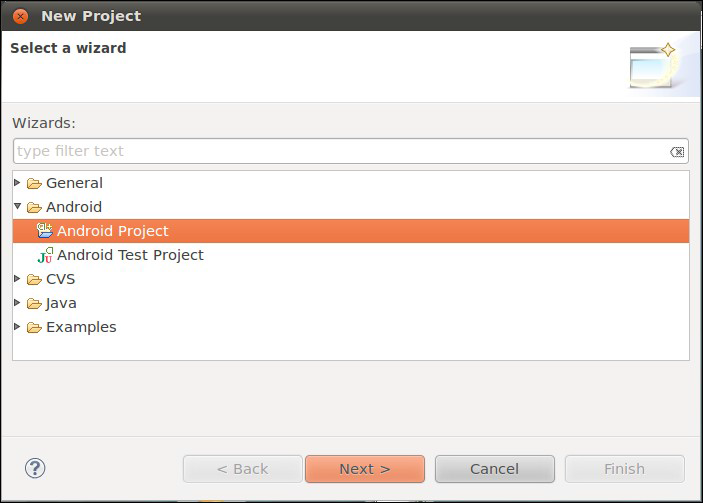
This is a tutorial of creating new android project from Eclipse tools. Note : If your eclipse dont have Android project, then you need to follow step by step here to install android plugin for eclipse . Install Android Plugin - Eclipse Eclipse From the Eclipse main menu, choose File >> New >> Project.; and this will bring up a list of project types to choose from. Fold open the Android option and click on Android Project: Press Next to advance the wizard to the main Android project page: Fill in the following:  The name of the project (e.g., Now) The Android SDK you wish to compile against (e.g., Google APIs for Android 2.3) The name of the Java package in which this project goes (e.g: com.commonsware.android.skeleton) The name of the initial activity to create (e.g., Now) At this point, clicking Finish will create your Eclipse project. Reference : Android Programming Tutorials, 3rd Edition By Mohd Zulkamal NOTE : – If You have Found this post Helpful, I will appreciate i

Java - Calculator Example

Image
This post will show how to create Calculator Application using Java langguage. This is only an example, you can add some feature into this example such as sin,cos,tan expression. Note : This example using netbean v 7.4 Step By Step Create New Project Choose Java Application Rename Project Name to Calculator Delete file Calculator.java Add New JFrame Form under package calculator and change class Name to CalcMainUI Drag and drop java Swing controller into frame. Refer CalcMainUIbelow. ( Note : you can change the position of button as you like). Create Java class . calculateClass.java CalcMainUI Code behind package calculator; import java.math.BigDecimal; import javax.swing.JOptionPane; /**  *  * @author developersnote  */ public class CalcMainUI extends javax.swing.JFrame {     /**      * Creates new form CalcMainUI      */     public CalcMainUI() {         initComponents();     }     /**      * This method is called from within the constructor to initialize the form.      * WARNING: Do